
Continuing with a breakdown of the dejarik game from Star Wars: A New Hope, I identified the pieces and their positions. Each piece has a detailed bio and history on Wookieepedia, but this actually hampered my progress and made me dizzy (trying to determine whether the physical traits of the monsters were clues to its place in the game: maddening.)
Chewie’s pieces:
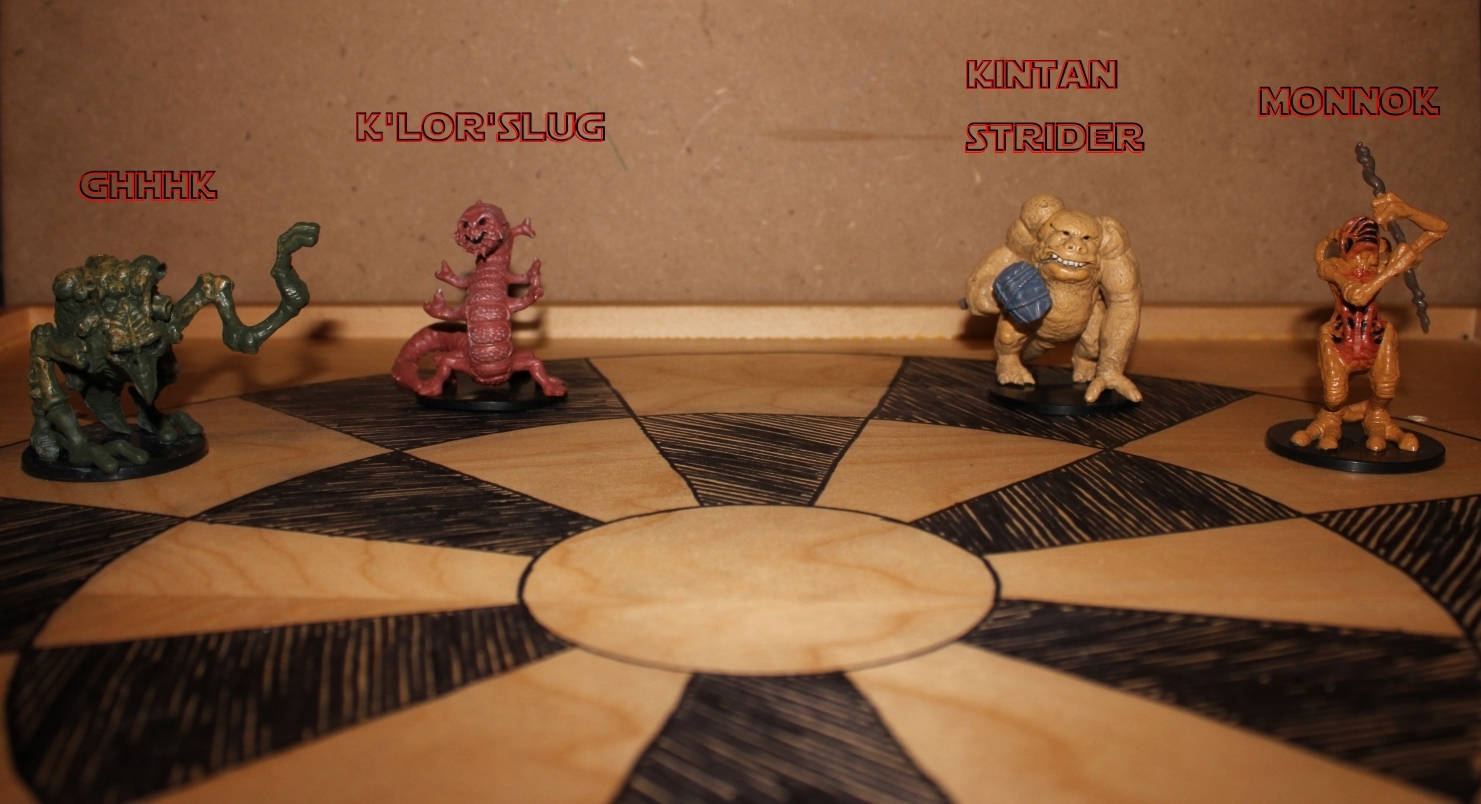
R2 D2’s pieces:

The unique nature of the pieces suggests that each has individual movement and capture rules, or that each piece represents a hierarchy, like the rook, knight, bishop and royals of chess. Star Wars expanded universe books have suggested that the pieces are generated randomly at the start of each game and the players must use what they are given, forming a strategy based on each unique mix. That idea would eliminate the possibility that certain pieces are mirrors of each other. Rather than each player having a “king,” “queen,” “bishop,” etc., each piece provides a unique set of moves the player can choose from during the course of a game.
In earth chess, each piece has a point value based on its power in the game but there are many subtle variations on this calculation and many depend on whether the piece is mid- or endgame (another maddening part of my research.) I decided to skip this complication and focus strictly on movement and capture capabilities.
I think I will save the “individualized pieces” idea for a more complex rules variation. For now, I will work with the idea that each piece represents a type. Offensive (queen: no limits; an attack piece), Defensive (rook and bishop: mobile, able to hold swaths of board from a single position), Controllers (knight: move them into position and control multiple spaces at once; watch the enemy squirm.) To determine which piece is which, I looked at the moves and actions shown in the movie. The finished game should be able to duplicate the movie’s game in principle, thereby maintaining consistency.
The moves shown in the movie progress like this:
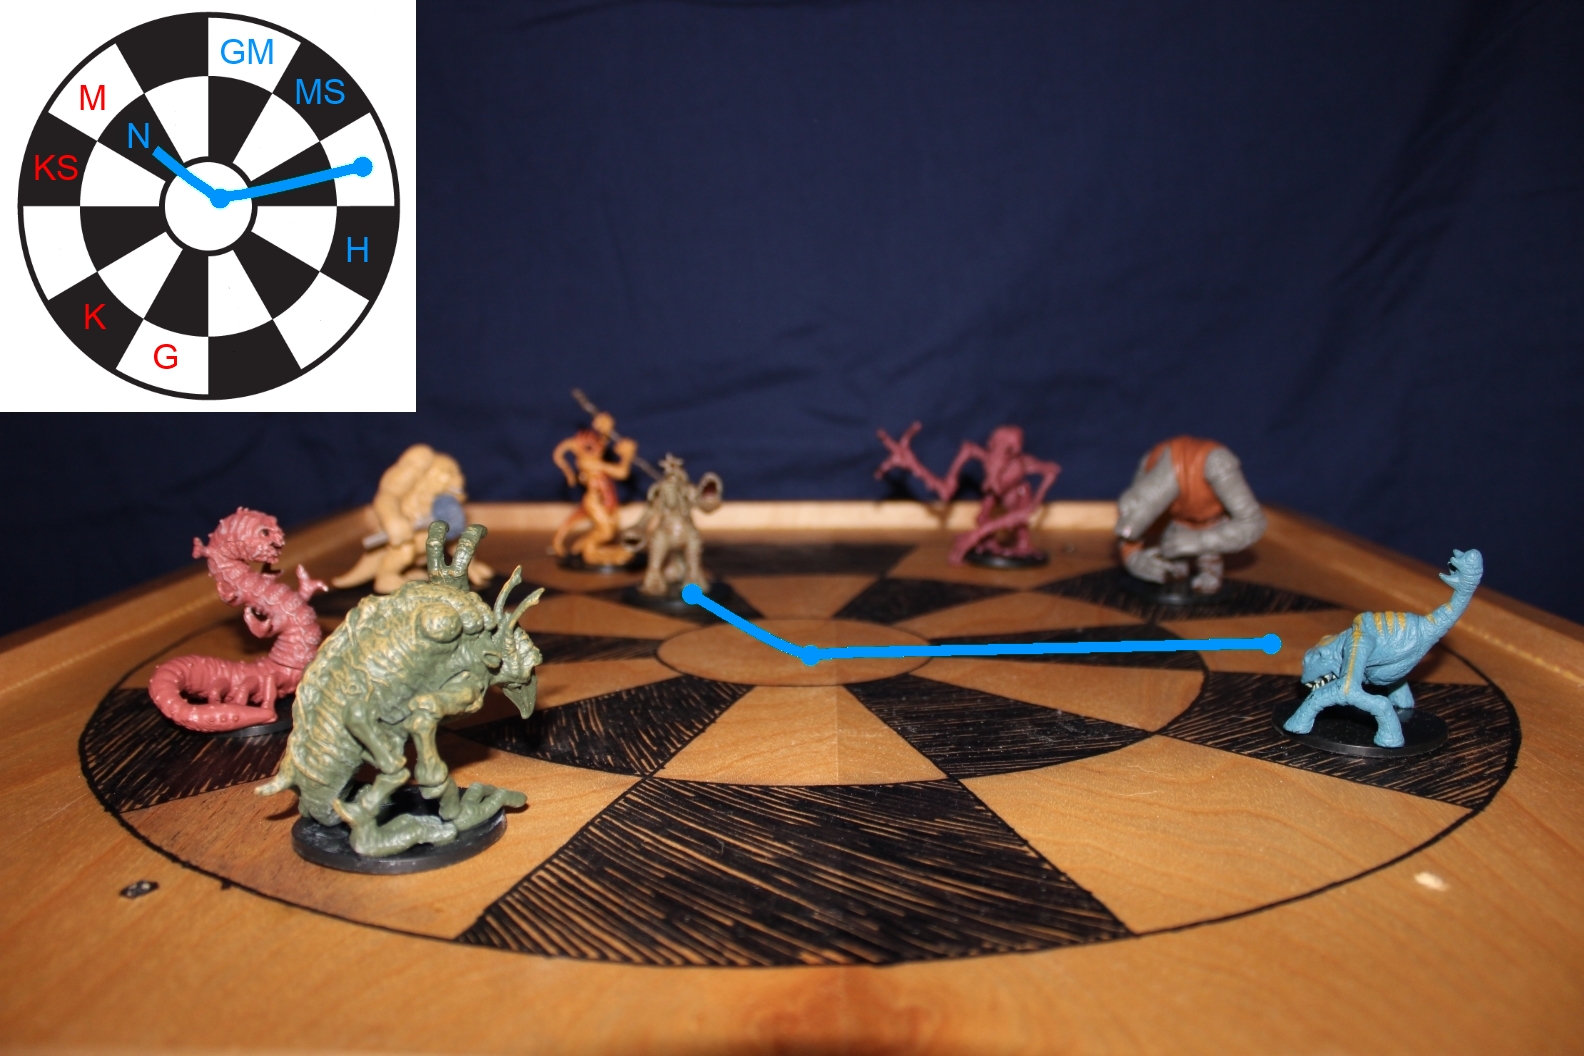
R2’s Ng’Ok moves through the center-point to end in front of Chewbacca’s Monnok. He also turns his back on the Monnok (the only piece to change its facing during the game); does this mean it has nothing to fear from the Monnok? I make a note of this.
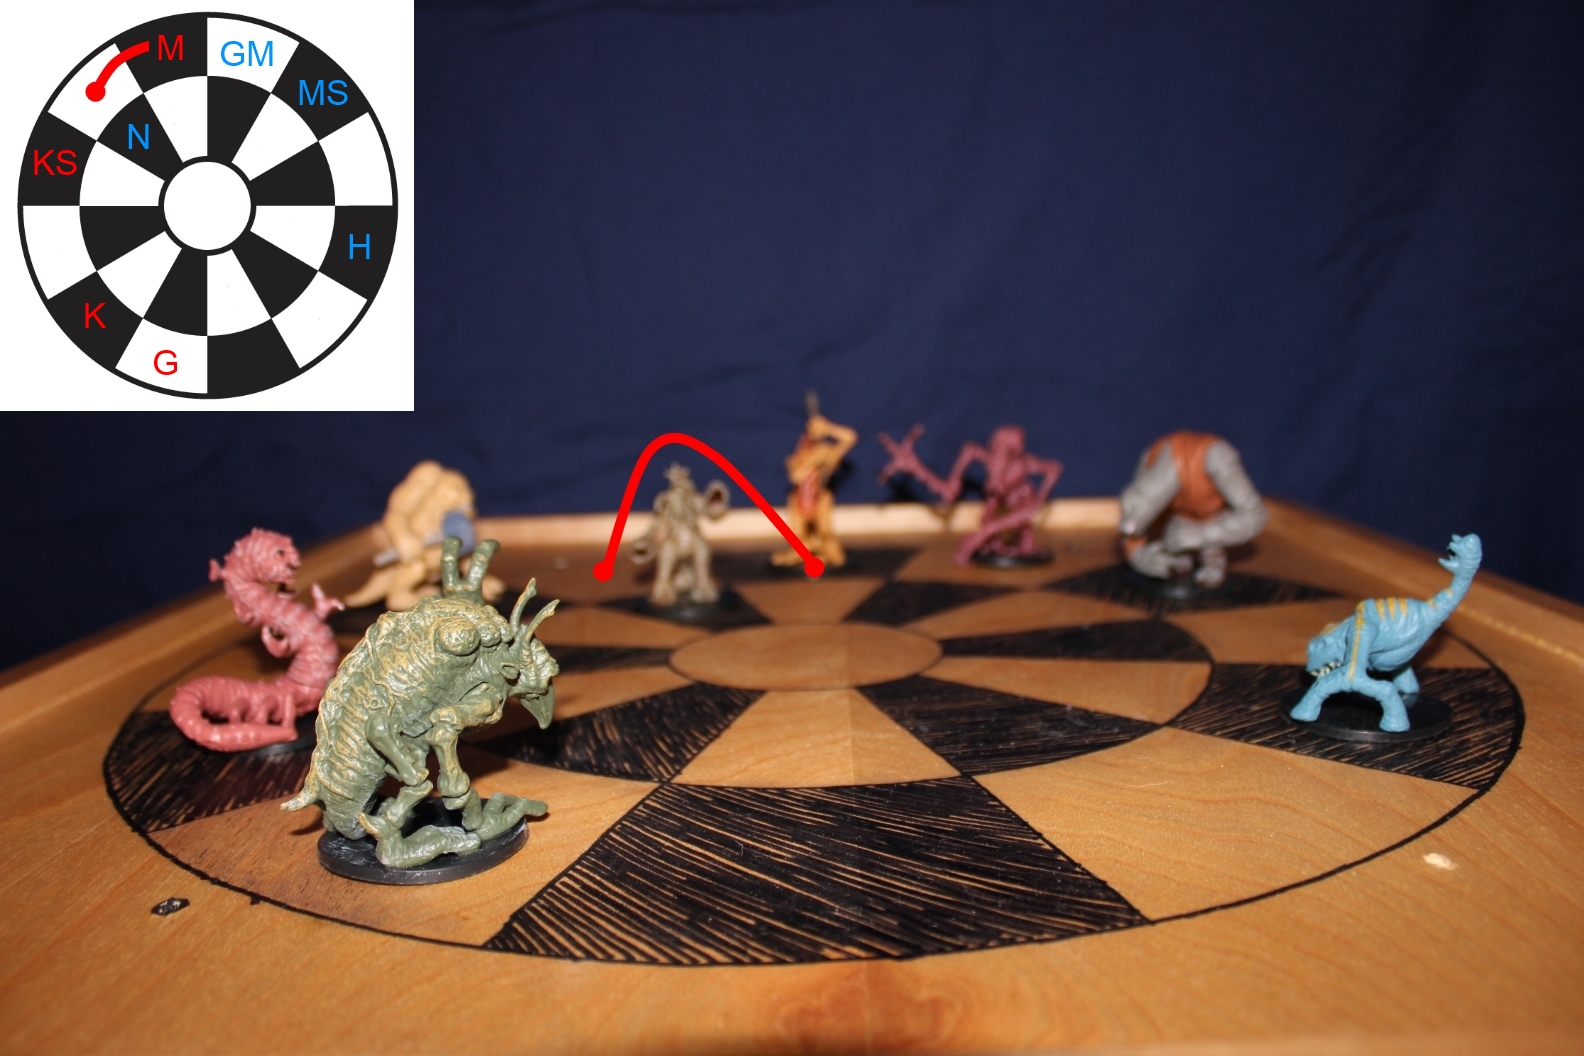
Chewbacca’s Monnok slides left one space, ending adjacent to R2’s Grimtaash and diagonal to the Ng’Ok. This looks like a threat move to the Ng’Ok (was it blocked from moving to the center? Or can it only capture diagonally, like a pawn in chess?)
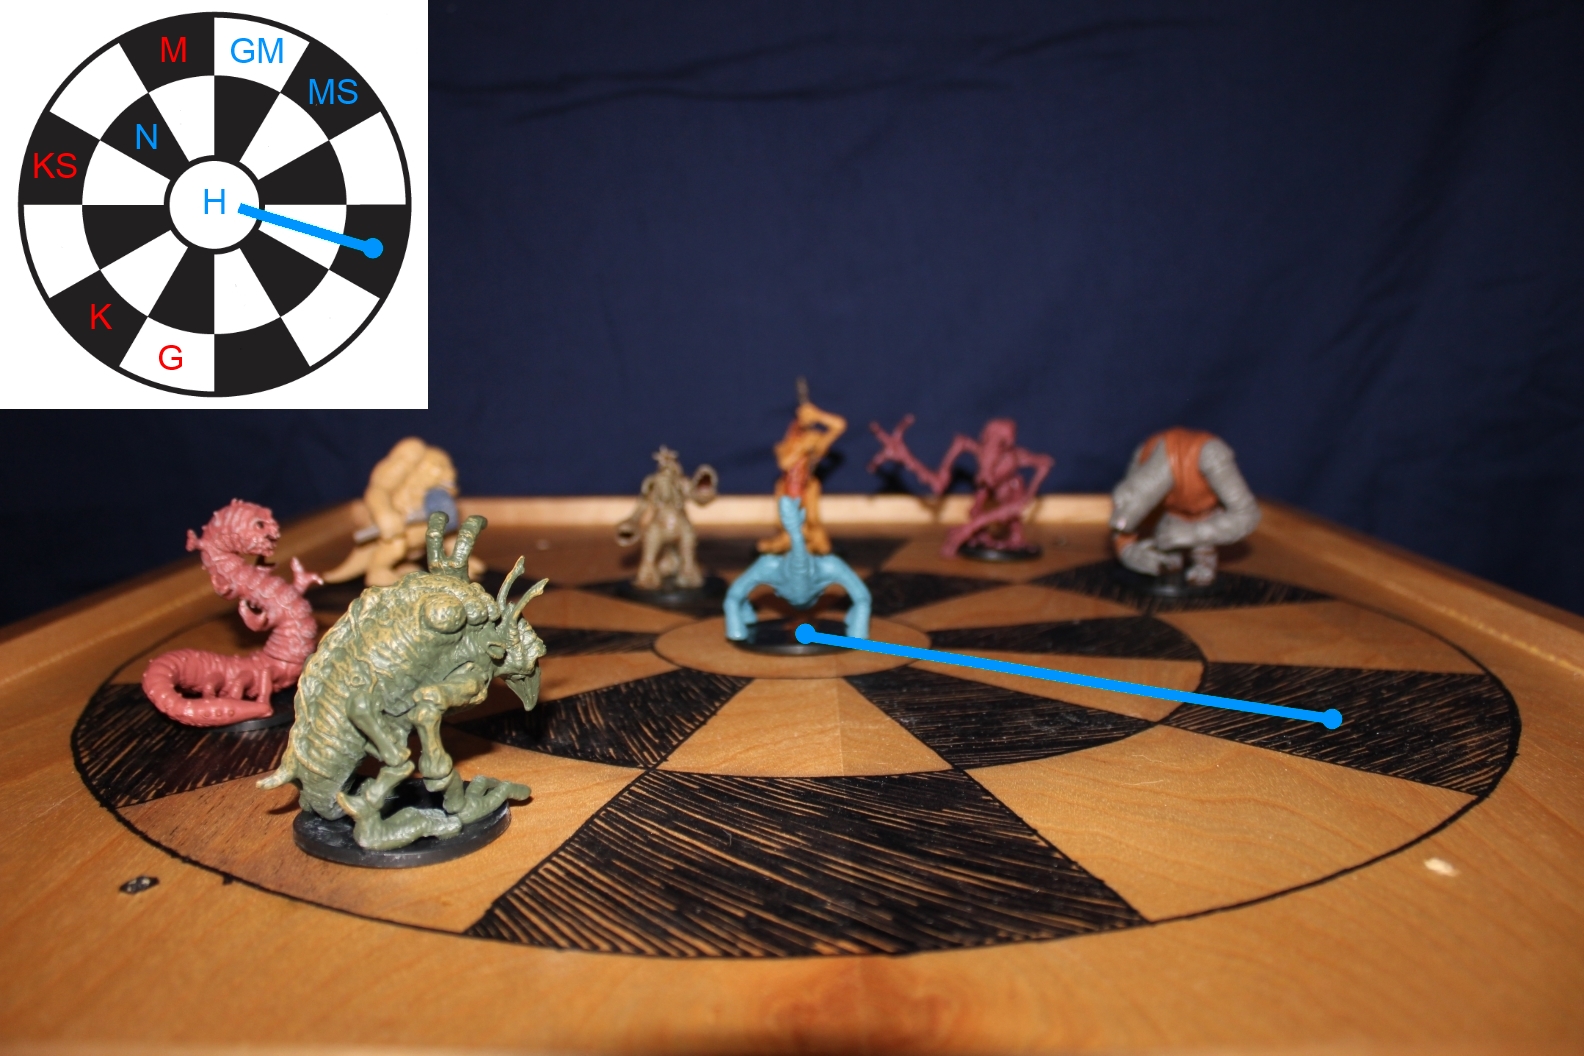
The Houjix now moves to the center. This could indicate defensive positioning with respect to the Ng’Ok (if the Monnok moves in, it will be threatened by the Houjix.)
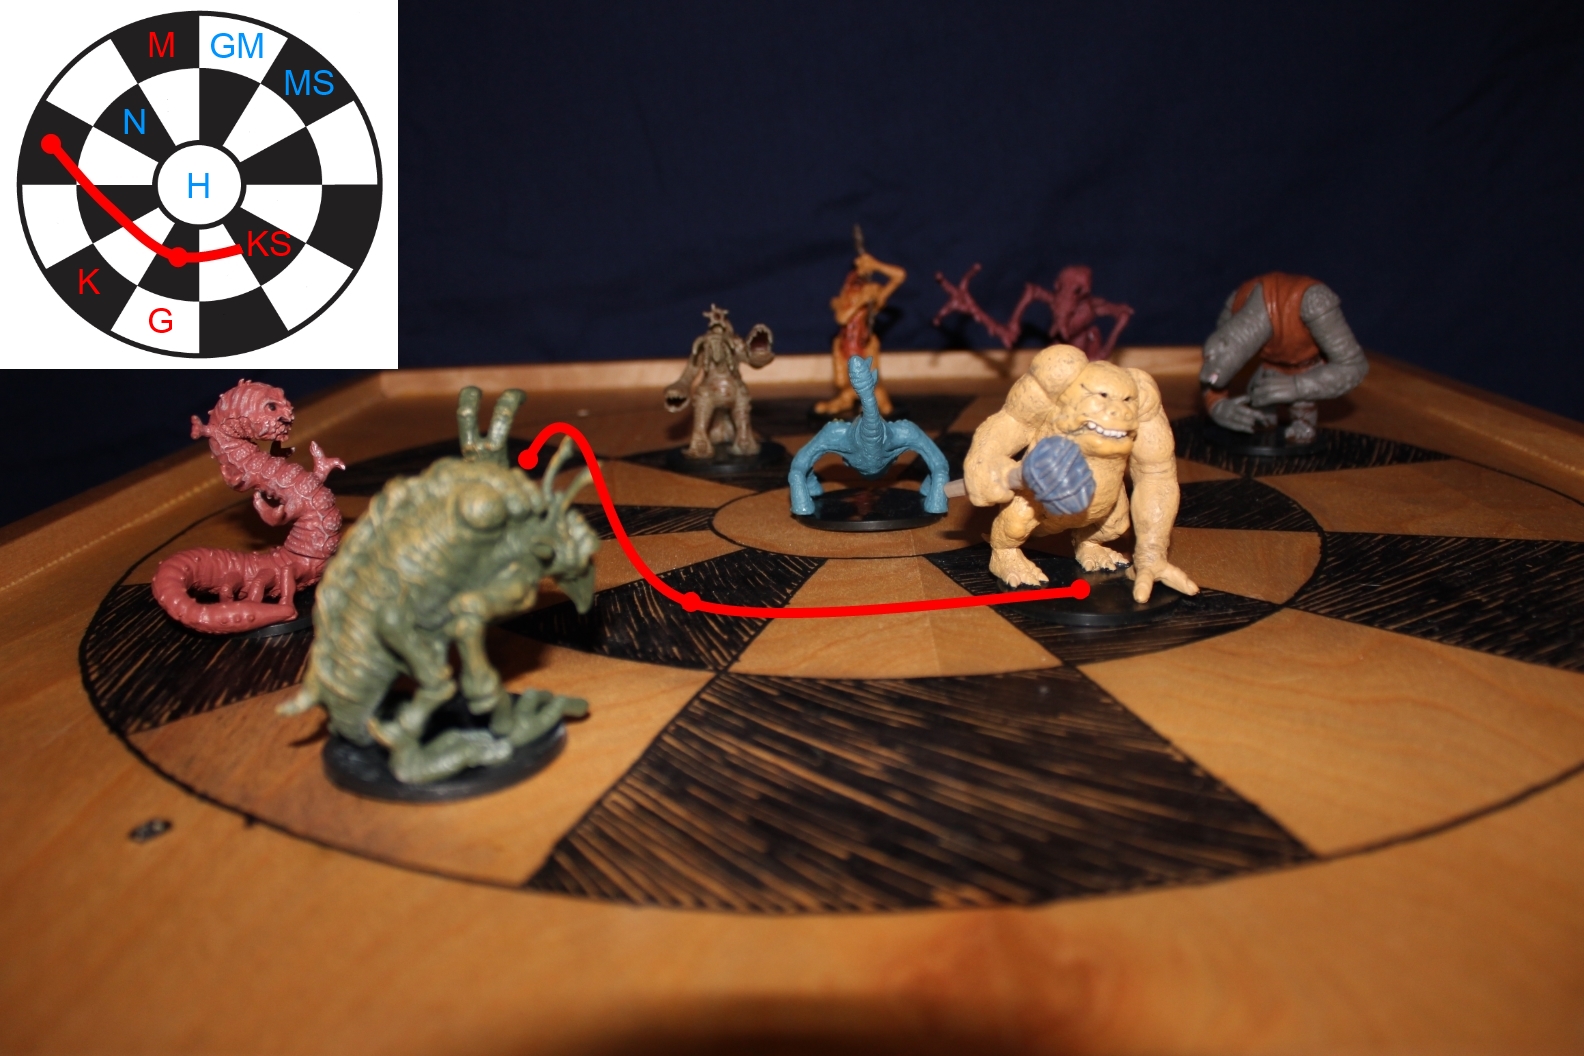
Instead of capturing, Chewie moves his Kintan Strider around behind the Houjix (however, it does not change its facing toward the Houjix.) Threepio’s warning for R2 to “be careful,” makes me wonder about the Strider’s positioning. Most likely it is a stand off: R2’s move could begin a series of captures, reducing the population of the board.
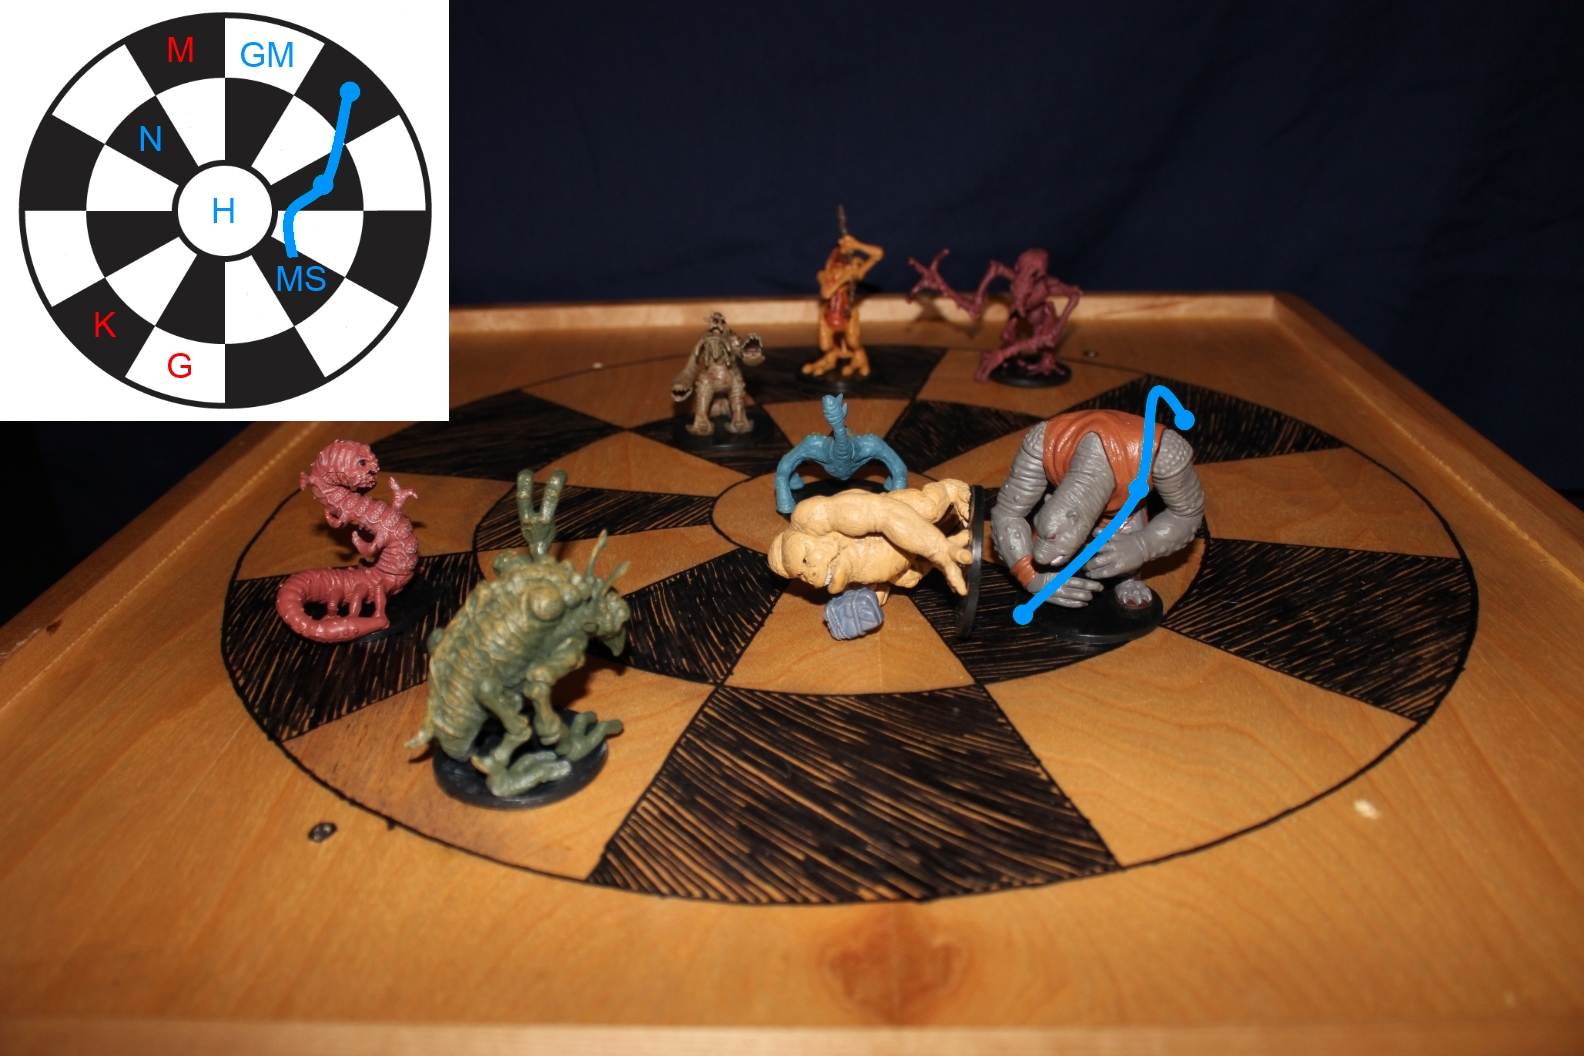
Instead, R2 eliminates the undefended piece. The Mantellian Savrip literally throws down with the Strider and Chewie gets angry (a frustrating loss because he cannot respond in kind? Potentially, if his Monnok captures the Ng’Ok--as I suspect its threat to be--it could in turn be captured by the Houjix from the center-point. And now that the Strider is out, the Houjix has nothing to fear?)

Things here get very weird. The conversation about Wookiees ripping arms from sockets occurs and Han makes the statement, “Let him have it.” Does this imply that the capture should be rescinded? In any case, we do not see the game board for a time because the scene focuses on Luke’s lightsaber training, but when it is shown again the Savrip is back in its original spot, the Strider is still missing, and the Monnok slides two spaces sideways: still diagonal from the Ng’Ok, but closer to the K’Lor’Slug (maybe it is in a position that can be defended by the Slug?)
The game ends here as the characters rush off to discover the fate of Alderaan. My biggest question is the Savrip’s return to its space of origin. did it give up the advantage of center space positioning as a concession to Chewbacca? (Was this in response to Han’s warning?) Or was it a rule of the game that once it eliminated the Strider it returned to the outer ring? (This seems arbitrary and unlikely. Reducing the game to a points-war of elimination seems to devolve its value from “chess” to “tic tac toe.”) While that is not impossible, I doubt valuable star ship space would be devoted to a high tech game of circles and exes.
What do you think of the game’s breakdown? Do you see something I missed? Post in the comments below, please. I welcome other viewpoints. Next time I will explore each move more fully and what I see as the piece’s strengths and limits, hopefully developing a ruleset that stands up to play-testing.
Next: Part 3: Moves and Threats (the strategy of the game.)
Sad to see that you apparently never made it to part 3. I would love to work out reasonable Dejarik rules, especially now that we've seen that it is played in non-holographic form in-universe. The fan rules I've seen treat it as a miniatures game, assuming that because of the computer's involvement (and animated combat) there must be an element of chance to the outcome of an attack (roll a bunch of dice and see who wins), which isn't necessarily the case..
ReplyDelete